social

Making Crochet Chain Wrapped Pumpkins


Gold Post Medal for All Time! 969 Posts
October 24, 2017

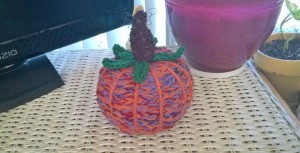
Yarn Bombed Pumpkin - pumpkin on tabletopThis was a labor of love, but I am happy with how it came out. With some yarn, hot glue, and a faux pumpkin you too can make one like this. I saw these on Pinterest, but I make mine crochet rather than with single strands of yarn.

Advertisement

Total Time: 4 hours

Yield: 1

Supplies:

  • 1 faux pumpkin ($1.00)
  • 3 oz orange, lavender, and variegated yarn
  • 1 oz brown yarn
  • 1 oz burnt orange yarn
  • 1 darning needle
  • 1 Square ft scrap foil
  • 1 hot glue gun
  • size N hook
  • touch of brown paint
  • scissors

Steps:

  1. With the three color of yarns together, hook onto a size N hook. Chain to your heart's content. There is not a way to really measure the yarn you need so I just make a ball.
  2. Yarn Bombed Pumpkin - chain using the three yarn colors
     
    Yarn Bombed Pumpkin - make a ball of the chain
     
  3. When you think you have enough, heat up the glue gun. It's always a good idea to begin at the start of your chain. This way, if you have to add or take away your chain is on the working end and is either to add to or unravel. Start at the top of the pumpkin and make a circle. Keep going around and around. Keep the glue close to the last row and your pumpkin won't show through.
  4. Yarn Bombed Pumpkin - starting at the beginning of your chain, start gluing to pumpkin tightly to prevent gaps
     
    Yarn Bombed Pumpkin - continue down the sides
     
    Advertisement

  5. Keep going up and over. When the pumpkin is a bit flatter, you will need to glue as you go. When you get to the "humps" you only need to glue at those places where the pumpkin is the fattest. Keep going down to the bottom and stop just after you get there. You don't want the pumpkin to show, but you don't want to make it so it's hard to sit level. Crochet a burnt pumpkin chain so you can accent the spaces between the humps. I folded mine in the middle so I can know where to start on the top and not run out of chain before you need to. Cross it on the bottom and keep going from the bottom to the top.
  6. Yarn Bombed Pumpkin - burnt orange chain
     
    Yarn Bombed Pumpkin - keep wrapping to the bottom, but do not cover the bottom. Make a chain from the burnt orange to highlight the ridges and wrap
     
    Advertisement

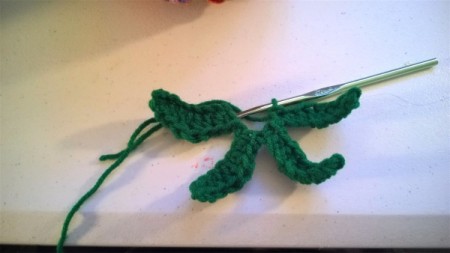
  7. For the leaves, I used a bit of green. Chain 8, make a single in the next chain, a half double in the next, two doubles in the next, a half double in the next and a single in the last. Do this 4 more times, and then tie the tails together and tie in the tails. Glue to the top of the pumpkin.
  8. Yarn Bombed Pumpkin - make leaves from green yarn and glue to the top
     
  9. For the stem I used a piece of foil shaped like a pumpkin stem. I chained some brown yarn and began gluing it around. When I got to the top, I left the tail just long enough to work into the chains below. I found some of the foil showed through, so I dabbed it with a bit of brown paint. Then I hot glued it onto the top and it was done. N-JOY!!
  10. Yarn Bombed Pumpkin - create a foil shaped stem and make a chain using the brown yarn
     
    Yarn Bombed Pumpkin - wrap foil with brown chain, cover foil tip with paint if needed
     
    Yarn Bombed Pumpkin - finished pumpkin
     
    Advertisement

In These Pages
Categories
Crafts DecorationsOctober 22, 2019
Pages
More
🍀
St. Patrick's Ideas!
💘
Valentine's Ideas!
🎂
Birthday Ideas!
Instagram
Sub-Categories
AdviceBooksCandyCostumesCraftsDecorationsGamesGhost StoriesHaunted HouseHistoryJokesLinksMake UpMiscellaneousPartiesPartiesPhotosPumpkin CarvingRecipesSafetyTipsTreats
Published by ThriftyFun.
Desktop Page | View Mobile
Disclaimer | Privacy Policy | Contact Us
Generated 2024-01-25 16:12:53 in 7 secs. ⛅️️
© 1997-2024 by Cumuli, Inc. All Rights Reserved.
https://www.myfrugalhalloween.com/Making-Crochet-Chain-Wrapped-Pumpkins.html