social

Making a "BOO" Pumpkin Sign


Gold Post Medal for All Time! 899 Posts
September 19, 2016

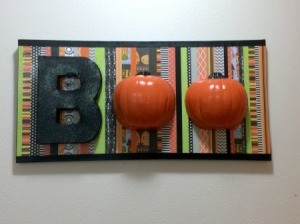
BOO Pumpkin SignGet ready for Halloween with this awesome 3-D sign! It was a great way to use all of those cool Halloween scrapbooking papers that I keep buying with no project in mind.

Advertisement

Supplies:

  • small foam pumpkin
  • paper mache letter "B"
  • stretched canvas
  • Halloween scrapbooking paper
  • Modge Podge
  • glossy black acrylic paint
  • glossy orange acrylic paint
  • glitter paint, optional
  • E6000 glue
  • knife or small saw
  • scissors
  • paint brushes
  • decorative tape, optional
  • crafting knife
  • cutting mat

Steps:

  1. Use a sharp knife or small saw to cut the pumpkin in half. Note: In the event that a piece comes off while cutting, simply glue it back in place (as shown below).
  2. BOO Pumpkin Sign
     
    BOO Pumpkin Sign
     
    BOO Pumpkin Sign
     
    BOO Pumpkin Sign
     
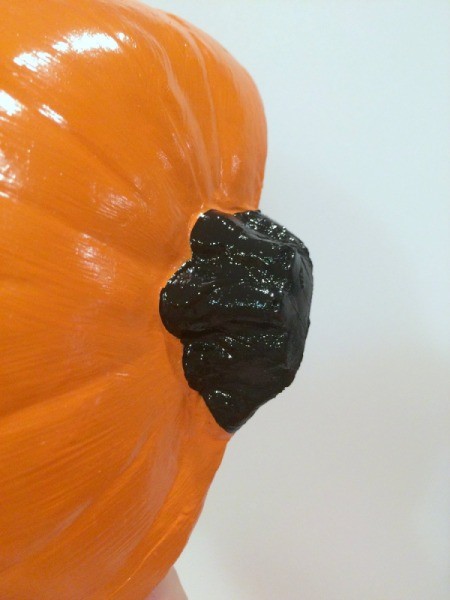
  3. Paint the pumpkin orange and the stem black (or brown if you prefer). Apply as many coats as needed.
  4. BOO Pumpkin Sign
     
  5. Paint the letter B black, applying 2-3 coats. I also applied a coat of glitter paint.
  6. BOO Pumpkin Sign
     
    BOO Pumpkin Sign
     
    Advertisement

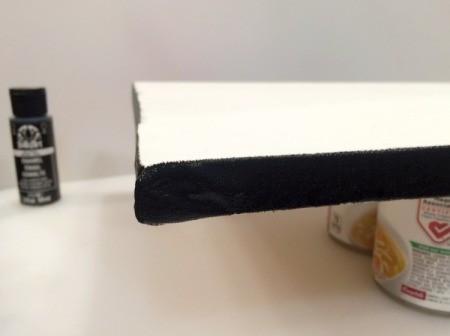
  7. Paint the edge of the canvas black. Make sure to come up over the edge a little bit, so that the white of the canvas doesn't show when the paper is trimmed.
  8. BOO Pumpkin Sign
     
  9. Cut the Halloween paper into varying width strips. Arrange them into a pattern you like. I recommend leaving the paper longer than the canvas, you will trim it off later.
  10. BOO Pumpkin Sign
     
    BOO Pumpkin Sign
     
  11. Use a brush to apply Modge Podge to the canvas and begin attaching the strips of paper.
  12. BOO Pumpkin Sign
     
    BOO Pumpkin Sign
     
    BOO Pumpkin Sign
     
    BOO Pumpkin Sign
     
    Advertisement

  13. I found that applying a coat of Modge Podge to the tops of the paper strips, while I was also attaching new strips was helpful to hold them down. Then apply 2-3 coats of Modge Podge to the whole surface, following package instructions. Allow Modge Podge to dry thoroughly before continuing with the next steps.
  14. BOO Pumpkin Sign
     
    BOO Pumpkin Sign
     
    BOO Pumpkin Sign
     
    BOO Pumpkin Sign
     
    BOO Pumpkin Sign
     
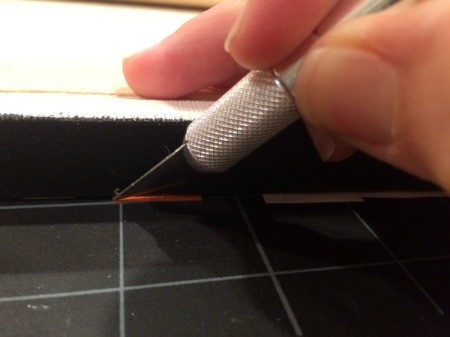
  15. Turn the canvas over and use a crafting knife to trim off the overhanging paper. I decided to add a stripe of decorative tape along the top and bottom. Then I added one more layer of Modge Podge.
  16. BOO Pumpkin Sign
     
    Advertisement

  17. Apply E6000 glue to the backs of the letter B and the pumpkin halves. Adhere them to the canvas. Allow the glue to thoroughly dry before hanging it up.
  18. BOO Pumpkin Sign
     
    BOO Pumpkin Sign
     
    BOO Pumpkin Sign
     
    BOO Pumpkin Sign
     
    BOO Pumpkin Sign
     

Videos

October 20, 2016

This decorative Halloween sign takes a little bit of time but is well worth the effort. Learn how to make it in this short video.

In This Page
Categories
Crafts DecorationsSeptember 20, 2016
Pages
More
🎃
Halloween Ideas!
🌻
Gardening
📓
Back to School Ideas!
Instagram
Sub-Categories
AdviceBooksCandyCostumesCraftsDecorationsGamesGhost StoriesHaunted HouseHistoryJokesLinksMake UpMiscellaneousPartiesPartiesPhotosPumpkin CarvingRecipesSafetyTipsTreats
Published by ThriftyFun.
Desktop Page | View Mobile
Disclaimer | Privacy Policy | Contact Us
Generated 2024-09-03 06:53:24 in 4 secs. ⛅️️
© 1997-2024 by Cumuli, Inc. All Rights Reserved.
https://www.myfrugalhalloween.com/Making-a-BOO-Pumpkin-Sign.html