R Barbara
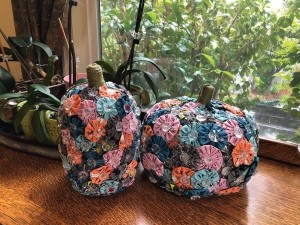
Bronze Post Medal for All Time! 190 Posts  I started this project some time ago when I was completely enamored with making yo yos for all sorts of potential craft projects. I am sharing them now because the yo yos can be a bit time consuming to make, so it is best to begin this project early. These two pumpkins were fun to make and would be a nice additional to your seasonal decor. Even though the fabric is quite Halloween themed, they can be used as a fall decoration and of course, can be made with any fabric choice.
Total Time: 2+ hours not including the yo yos
Supplies:
- various Halloween or fall themed cotton fabric pieces, I used fat quarters
- needle
- thread
- green jut cord
- orange acrylic paint
- foam or bristle paint brush
- clear plastic buttons - I used Favorite Findings icy ICE buttons from JoAnn Fabrics
- hot glue gun and refills

Steps:
- Make your yo yos, in the size that you choose. The tutorial for making them with and without a plastic yo yo maker can be found here: Making Fabric Yo Yos
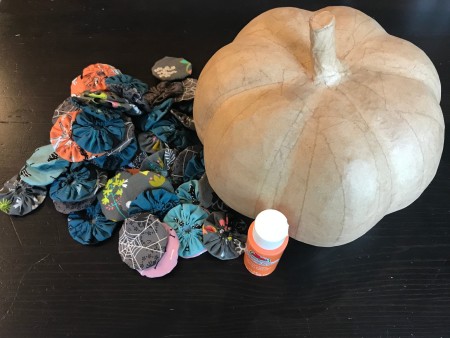
- Paint the bottom of the pumpkin as you will not cover it with yo yos.
- Wrap the stem with the jute cord. When you reach the top add some hot glue and spiral the jute to cover the top of the stem.
- Begin glueing the yo yos to the pumpkin until it is completely covered, except the bottom.
- Once the pumpkin was covered with the yo yos I added the clear buttons for a bit of sparkle. I also glued them in place with hot glue.
- The second pumpkin was made following the same process, but using smaller yo yos. It was a bit more of a challenge to get the coverage I wanted due to the deeply furrowed shape. Here are photos taken of assembling the second pumpkin.
- Some of the buttons used on the second pumpkin were plain with a narrow edge and a noticeable center depression. I had some tiny colored two hole buttons and glued them on these buttons.
- They are ready to display.
Add your voice! Click below to comment. ThriftyFun is powered by your wisdom!

 I started this project some time ago when I was completely enamored with making yo yos for all sorts of potential craft projects. I am sharing them now because the yo yos can be a bit time consuming to make, so it is best to begin this project early. These two pumpkins were fun to make and would be a nice additional to your seasonal decor. Even though the fabric is quite Halloween themed, they can be used as a fall decoration and of course, can be made with any fabric choice.