social

Selecting and Carving Pumpkins for Halloween


Gold Post Medal for All Time! 858 Posts

Halloween has become a huge holiday. According to a survey conducted by the National Retail Federation, consumers spent $3.29 billion dollars on Halloween in 2005. Of that $3.29 billion, $840 million was spent on decorations-second only to Christmas in holiday home decor. Talk about frightening! Even with all newfangled lighting effects, fog machines and animatronics designed to create hair-raising effects, a carved pumpkin is still the best and least expensive way to create a haunting Halloween scene.

Advertisement

Here are some tips for selecting and carving the perfect Jack-O-Lantern.
Selecting the Perfect Pumpkins

  • Before you select your pumpkins, decide on your carving design and your Halloween decorating goals. Do you need several pumpkins of a uniform size to line your walkway or a trio of pumpkins to create a display on your porch? Make a list of your needs before you go shopping so you can select pumpkins in the sizes and shapes that best fit with your decorating plan.

  • Shop early for the best selection. Store small pumpkins in the refrigerator and larger pumpkins in a cool, dry locations (e.g. basement or garage) until you're ready to carve them.

  • Look for fresh, firm pumpkins that are free from bruises or soft spots. They should be uniform in color and have at least one "good" side for display.
    Advertisement

  • Select pumpkins that have a 2 to 3 inch stem. Pumpkins with small stems (or no stems) are more prone to decay.

  • If your pumpkin has the perfect shape except for a wobbly bottom, don't worry. When carving you can cut off the bottom to even it out and place the pumpkin over the light, rather than setting the light into it from above.

  • The texture of your pumpkin can play into your overall design. Pumpkins with a smooth surface are easier to draw on, while bumpy, wart-covered pumpkins lend to a more ominous feel.

  • To make cleaning less difficult, pick a pumpkin that is big enough to stick your fist into so you can remove the seeds and pulp easily.

Carving Tips and Tricks

  • Young children should be supervised at all times when carving pumpkins. Please keep them away from sharp tools. Most young children are more than happy to help design and clean the pumpkins and leave the carving portion of the project to the adults.
    Advertisement

  • Most of the tools you'll need for carving are probably already in your kitchen or garage: spoons and scoops (for cleaning out the seeds and pulp), and assorted long-bladed knives and saws (for carving out various elements of your design). You will also need patterns (print them out or draw your own), tape (to tape patterns to pumpkins), grease pencils (to draw freehand patterns directly onto pumpkins) or nails/poker tools (to transfer stencils onto pumpkin) and newspaper to cover your work surface.

  • An alternative to carving is to paint your pumpkins using an assortment of post paints. Use freehand designs or "carve" out a stencil using black and yellow paint. You children may also enjoy covering their pumpkins with Halloween-themed stickers.

Jack-O-Lantern Lighting

  • Votive-sized candles are suitable for medium to large pumpkins. Tea lights can be used for smaller pumpkins. For a brighter light and longer burning time, keep candles in glass candle holders.
    Advertisement

  • Never leave pumpkins containing burning candles unattended.

  • Never use candles to light artificial pumpkins.

  • Hardware stores and craft stores now carry many safe and convenient alternatives to candles. These include battery operated lights and strobe lights, "artificial candles," lights that change colors and high intensity glow sticks.

Keeping Pumpkins Fresh

  • After pumpkins are carved, coat them (inside and out) with a thin layer of petroleum jelly. This helps seal in moisture and help prevent the pumpkin from drying out so fast.

  • As an alternative to petroleum jelly, cover the pumpkin with plastic wrap or place it in a plastic bag and store it in the refrigerator or a cool room until you're ready to display it.

  • A shriveling pumpkin can be temporarily revived by soaking it in a bucket of cold water for a few hours.

  • The heat from lights and candles can dry out the inside of a pumpkin quickly. Make sure the design of your pumpkin allows for plenty of air flow to allow the excess heat to escape.
Advertisement

Pumpkin As Planters

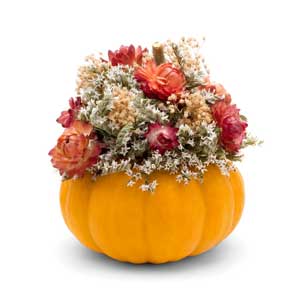
pumpkin centerpiece

  • You don't have to carve a ghoulish face on your pumpkin in order to use it as a Halloween decoration. A hollowed-out pumpkin will easily hold a potted plant or a bouquet of fall flowers. Fill them with mums or orange, yellow and black pansies and use them on the front steps or as a centerpiece during your holiday parties.

Preparing and Freezing Pumpkin Meat

  • To prepare pumpkin meat for use in fall recipes, cut the pumpkin in half and remove the seeds and pulp. Cut the meat into large chunks and place them cut side down on a microwave-safe plate. Microwave on high for 15 minutes and check for doneness. Continue to cook on high at 1 to 2 minute intervals until the meat is tender. When cool enough to handle, remove the peel. Mash the remaining meat into a puree using a food processor, potato masher or food mill. Spoon one cup portions of the puree into rigid containers (leave 1/2 inch of headspace) and freeze at 0º F for up to 1 year.
Advertisement

Roasting Seeds

  • 2 cups pumpkin seeds (approximate)
  • 2 Tbsp. oil or melted butter
  • 1 tsp. salt (optional)

Preparation: Wash the seeds well and stir with oil in bowl. Spread out in a single layer on a cookie sheet. Sprinkle salt, garlic salt or Italian herbs on top if desired. Bake at 250 degrees F. until slightly brown, turning them over every half hour. When they're done, they'll be crunchy. Variations include soaking the seeds in butter, soy sauce or Worcestershire sauce for 1 hour prior to roasting.

Free Pumpkin Carving Stencils

A quick search on the web will turn up lots of links for free carving stencils. Here are a few to get you started:
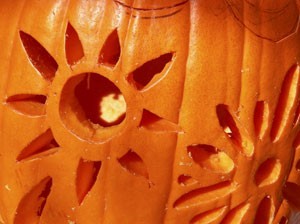
A flower or sun pattern carved into a pumpkin.
 

About The Author: Ellen Brown is our Green Living and Gardening Expert. Click here to ask Ellen a question! Ellen Brown is an environmental writer and photographer and the owner of Sustainable Media, an environmental media company that specializes in helping businesses and organizations promote eco-friendly products and services. Contact her on the web at http://www.sustainable-media.com

Add your voice! Click below to comment. ThriftyFun is powered by your wisdom!


Bronze Feedback Medal for All Time! 226 Feedbacks
October 9, 20140 found this helpful

My favorite pumpkin carving tool is a wallboard saw. We have used the same one for years. Makes carving the big ones quick and easy and seems safer than a knife. It is certainly much faster. They cost a couple dollars.

 
October 23, 20230 found this helpful

At our previous house, wed have truckloads of trick or treaters every year, so Id go to the Methodist church and find their biggest pumpkin, plus one or two smaller ones. Once the big one was carved, Id set it on a cinder block and put legs on it (black knee socks over metal hangers) and a witchs hat.

But then we moved here. The first Halloween, I carved some elaborate pumpkins only to have NO trick-or-treaters. None. Were all on individual acres, and its easier to just go to town and go door-to-door. So, I decided not to do any more jack-o-lanterns.

I thought Id cleaned up all the pumpkin debris from the first year, but the next year, we had a large vine in the front yard that we thought was squash, but then it grew several good-sized pumpkins. Id let a seed get away from me.


Add your voice! Click below to comment. ThriftyFun is powered by your wisdom!

 
In This Page
Categories
Pumpkin CarvingOctober 9, 2008
Pages
More
🎃
Halloween Ideas!
🌻
Gardening
📓
Back to School Ideas!
Instagram
Sub-Categories
AdviceBooksCandyCostumesCraftsDecorationsGamesGhost StoriesHaunted HouseHistoryJokesLinksMake UpMiscellaneousPartiesPartiesPhotosPumpkin CarvingRecipesSafetyTipsTreats
Published by ThriftyFun.
Desktop Page | View Mobile
Disclaimer | Privacy Policy | Contact Us
Generated 2024-09-02 16:42:52 in 1 secs. ⛅️️
© 1997-2024 by Cumuli, Inc. All Rights Reserved.
https://www.myfrugalhalloween.com/tf84305795.tip.html